Papoose Rail Repair
During the 2008 Jessica Cup Papoose ripped her 155 jib and in the process pulled up the rail on the port side. It turns out that this area of hull was damaged in the 1960's in a race in SF Bay. Although Papoose was a Southern California boat, she was also fast and heavily raced. I have been told that she won half the races she entered by someone who raced on her at the time. He said that they came up to SF to race some series and thought they could get past this buoy that was off Chrissy Field at the time. The buoy is no longer there. Papoose hit the buoy and almost had here rig torn off but made it out with just some hull damage. My dad always wondered what happened but after I got the boat, with the wonder of the Internet, I talked to someone who was on the boat at the time, thus the story above.
The new Quantum 155 jib tacks right at that point of damage. The hull was split and the backing block under the deck had been pushed away by the collision and the screws that held the rail at that point went into the air between. Here are a couple of pictures taken after the block was removed.
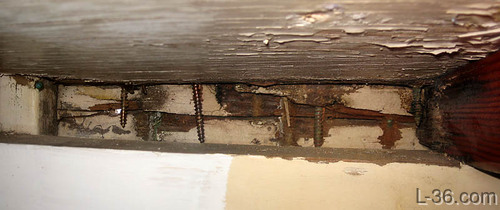
This is a picture from below looking sideways at the port hull
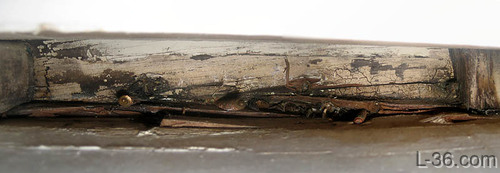
This looks at the same section but looking up at the bottom of the deck.
I put thick West System epoxy liberally in the cracked hill and put the backing block back. I held it in place with a screwdriver used as a pry bar to keep the block in postion while the epoxy dried. There was not enough of the hull with sound wood to sink a screw into to hold it in place.
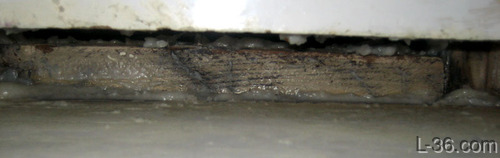
Backing block and lots of excess epoxy.
You can see from these shots that the hull is in pretty bad shape. I removed about 5 feet of rail and plugged the holes with mahogany dowels that I cut. You make dowels by pounding a square peg through a round hole, by the way.
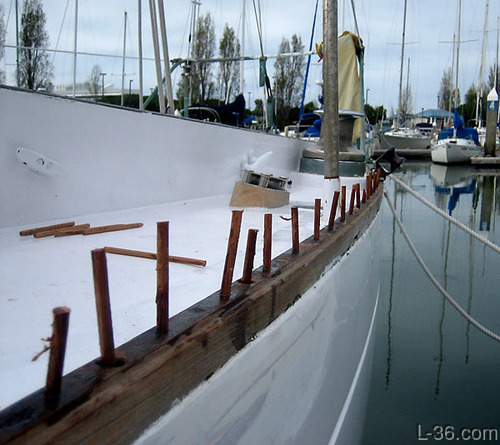
Here are the dowels after the glue set. You may notice that the existing screws were angled every which way.
I wanted to have the new screw holes go through the hull so I first did some measurements and did a drawing of the existing deck and hull.
Drawing based on careful measurements including drilling a hole to measure hull thickness.
I wanted to keep the position of the end of the 4 inch screw exactly where I wanted in the hull. I decided I wanted it centered 0.55 inches from the outside of the hull. You can see from the picture that if the screws were set at 90 degrees to the deck, they would not to through the hull very far. They would penetrate the hull inside and go into the backing block (not shown). I wanted them in the hull so that they would keep the hull fastened as well as hold down the rail. I built a fixture that would position it right there. The fixture has a bolt that fits securely in the countersunk hole in the rail to position the drill centered in the rail hole. It rests fore and aft on the rail so that the hole will be perpendicular to the deck. The adjustable cap screw forms a stop that rests against the outer edge of the hull when the hold is drilled. Here is a picture showing the fixture with the drill inserted in the guild hole drilled in the bolt that goes into the counter sunk hole in the rail when the pilot hole is drilled.
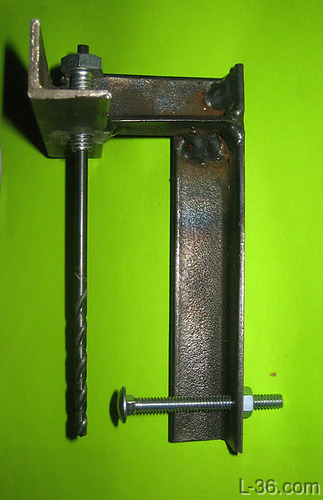
Fixture welded up to keep drill tip positioned relative to hull
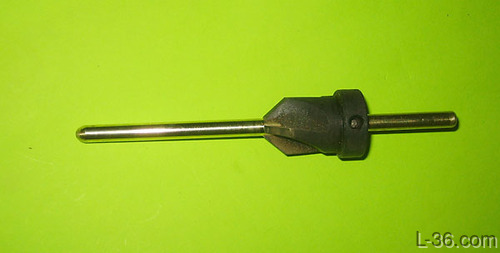
Counter sink with hole in it same size as pilot hole.
Brass rod fits exactly where screw will go so bronze rail can be counter sunk to match new angle of screws.
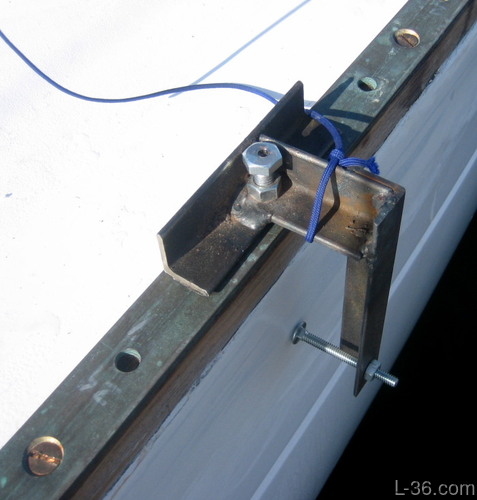
Here is a picture of the fixture in place on the finished rail in the position it would be in to drill another hole.
NOTICE: Some pages have affiliate links to Amazon. As an Amazon Associate, I earn from qualifying purchases. Please read website Cookie, Privacy, and Disclamers by clicking HERE. To contact me click HERE. For my YouTube page click HERE